How to prototype effectively
TL;DR
Summary
Prototyping is the craft of building an interactive representation of a product, realistic enough to be tested with users, but quick enough to produce that it stays disposable.
Goals
Pick the right fidelity for your project stage, build a testable prototype in minimum time, and learn fast from user feedback.
What is prototyping in UX?
A prototype is a simulated representation of a product that lets you test design hypotheses before investing in development.
Prototyping sits at the heart of any user-centered design approach. The core idea is simple: rather than specifying, developing, and shipping a product only to discover that users don’t get it, you build a simplified version and put it in users’ hands as early as possible. You learn, you iterate, you start over.
The goal is to find the right balance between speed of production and the realism needed to get useful feedback. A prototype that’s too rough won’t let users project themselves into it. A prototype that’s too polished takes too long to produce, and you’ll struggle to throw it away or rework it deeply.
This principle was perfectly summed up by the creators of the Design Sprint: “A prototype just realistic enough to provoke honest reactions.”
Fidelity levels
Fidelity describes how closely a prototype resembles the final product. There are generally three levels.
Low fidelity (low-fi)
What: paper sketches, black-and-white wireframes, hand-drawn diagrams on a whiteboard.
Characteristics:
- No color, no typography, no real images.
- Content areas are shown as gray blocks or wavy lines.
- Interactions are simulated manually (you flip pages, you reveal a new screen).
- Production time: minutes to hours.
When to use it:
- During discovery, when you’re exploring multiple directions.
- During a sketching workshop with stakeholders.
- When you want to test information architecture or screen hierarchy.
- When you need to test 3 or 4 different concepts in a single day.
Pros:
- Extremely fast to produce.
- No aesthetic bias: users focus on structure and content, not colors or images.
- Easy to modify in real time during a test.
- Anyone can sketch: you don’t need to be a designer.
Limits:
- Hard to test complex interactions (animations, transitions, dynamic forms).
- Some users struggle to project themselves onto sketches.
Tools: paper and markers, whiteboard.
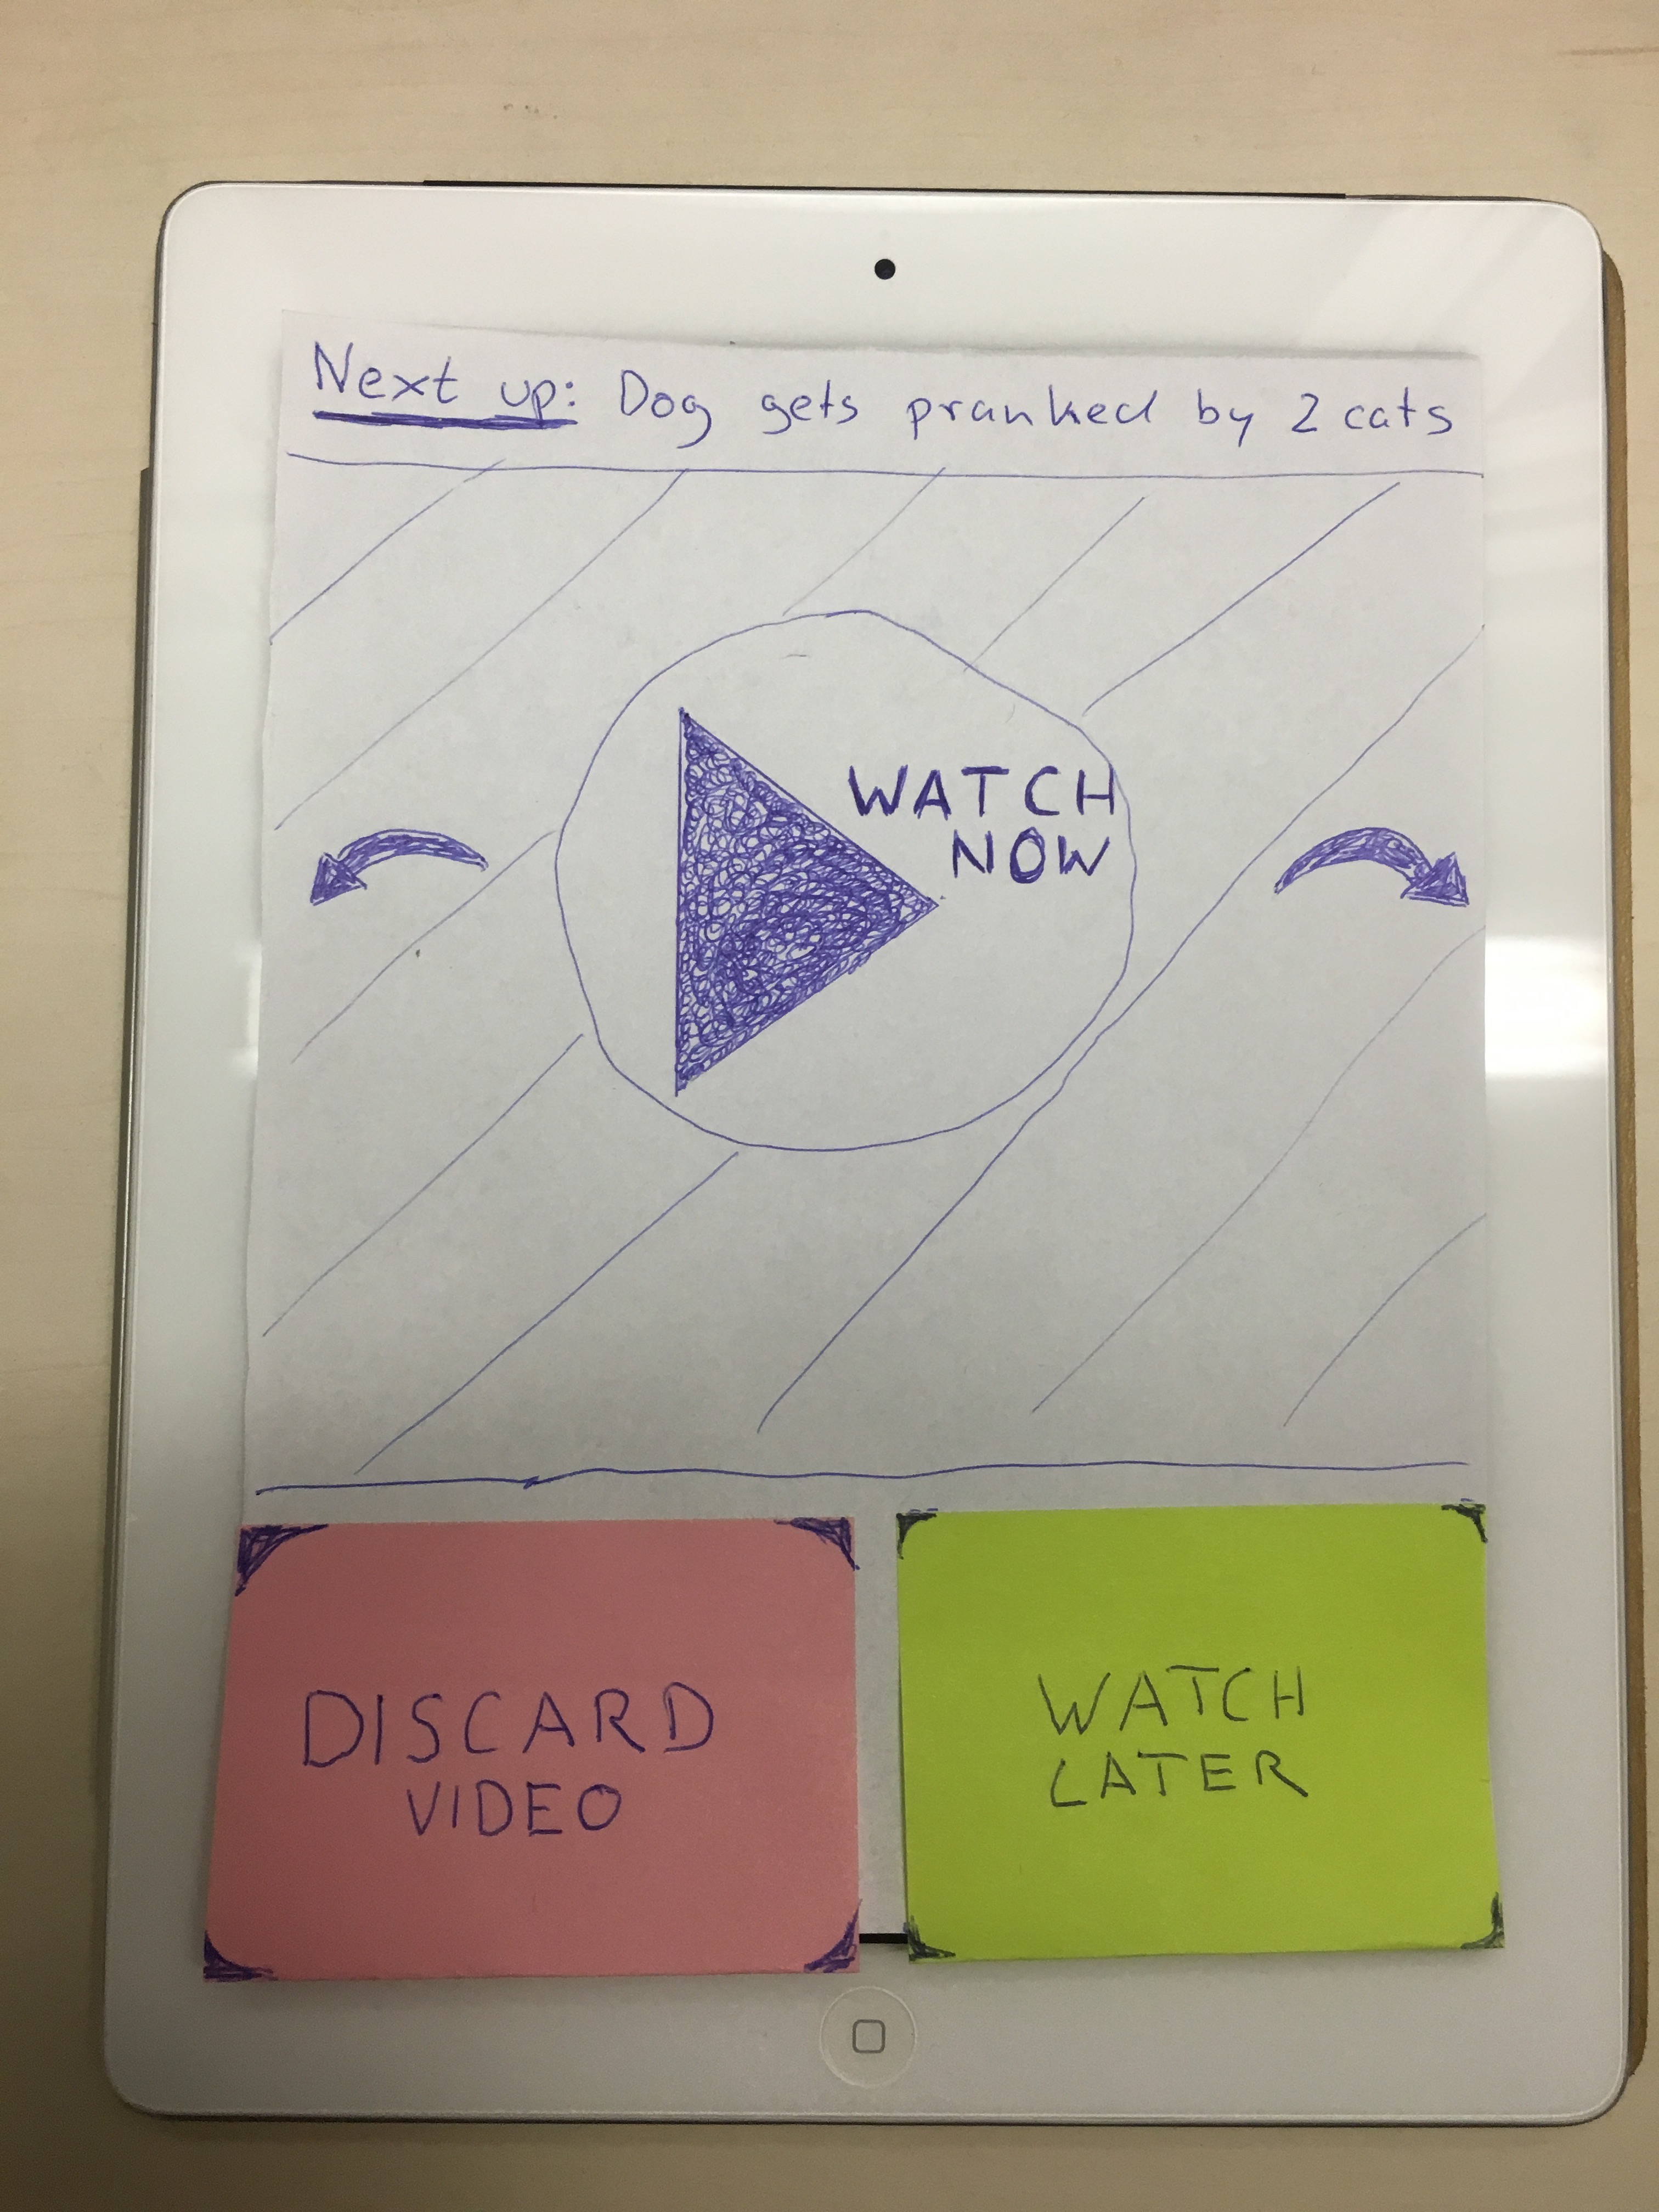
Paper prototype placed on a tablet to simulate the experience. Credit: Tobe101, CC BY-SA 4.0, via Wikimedia Commons
Medium fidelity (mid-fi)
What: interactive grayscale wireframes, with clickable navigation, real text content but no visual identity.
Characteristics:
- Grayscale with a few color accents for interactive elements.
- Real typography and real text content (or realistic content).
- Clickable navigation: users can browse the screens on their own.
- Production time: a few hours to a day.
When to use it:
- When the overall direction is validated and you need to test navigation flows.
- To validate content organization with real text.
- When you’re prepping a user test and the context calls for a minimum of realism.
Pros:
- Users can interact with the prototype on their own.
- Realistic enough to test full journeys.
- No debate about colors or visual design: the focus stays on usage.
Limits:
- Requires a prototyping tool (Figma, Axure).
- Slower to modify than a paper sketch.
Tools: Figma (even though you can go further), Axure RP.
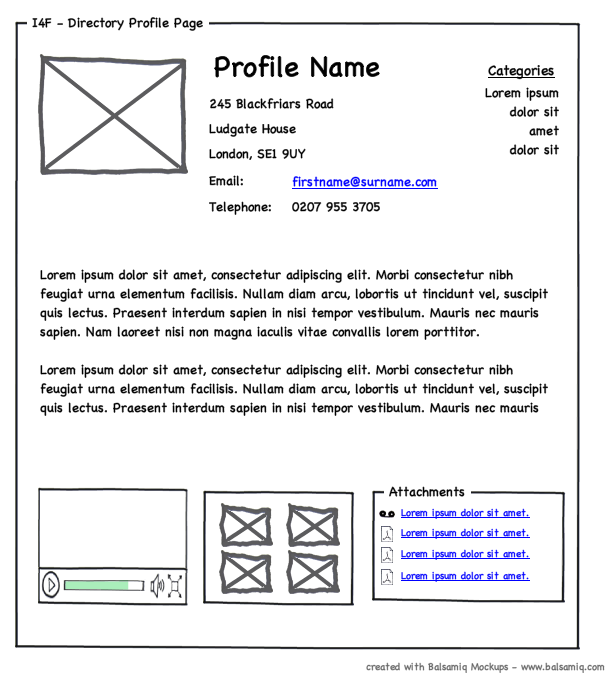
Example of a medium-fidelity wireframe. Credit: doos, CC BY 2.0, via Wikimedia Commons
High fidelity (hi-fi)
What: a pixel-perfect interactive prototype with the final visual identity, real visuals, animations, and micro-interactions.
Characteristics:
- Visual identity applied (colors, typography, iconography).
- Real images or final illustrations.
- Advanced interactions: transition animations, hover states, micro-interactions.
- Realistic data in fields, lists, and tables.
- Production time: 1 to 5 days depending on complexity.
When to use it:
- For final validation, just before development.
- To communicate a product vision to non-technical stakeholders.
- For user tests on critical journeys where aesthetics influence behavior (e-commerce, onboarding, landing pages).
- For developer handoff.
Pros:
- Users interact as if it were the real product: feedback is very close to reality.
- Useful as a visual spec for developers.
- Impresses stakeholders and helps with alignment.
Limits:
- Slow to produce, costly to modify.
- Risk of bias: users may be impressed by the visual and not dare to criticize.
- The team may emotionally attach to the prototype and resist changes.
Tools: Figma (advanced prototyping), Axure RP (conditional logic), Framer (code-based prototype).
Summary table
| Criterion | Low-fi | Mid-fi | Hi-fi |
|---|---|---|---|
| Production time | Minutes to hours | Hours to 1 day | 1 to 5 days |
| Skills required | None | Wireframing tool | Design + prototyping |
| What you test | Structure, hierarchy, concepts | Flows, navigation, content | Full experience, micro-interactions |
| Project phase | Discovery, ideation | Design, iteration | Validation, handoff |
| Main risk | User can’t project themselves | Debates over missing visual details | Prototype too “precious” to throw away |
Building a testable prototype in 1 day: step-by-step guide
Here’s a proven method to build a testable mid-fi prototype in a day. This is the approach I use during day 3 of a Design Sprint. It works just as well outside a sprint.
Step 1: Define the journey storyboard (1 hour)
Before opening Figma, grab a sheet of paper and draw the journey the user will follow during the test. The goal is to define the critical path: the sequence of screens the user must walk through to complete the task you’ll give them.
- List the journey steps as boxes, like a comic strip. Each box matches a screen or a screen state.
- Number the boxes in journey order.
- Note user actions between boxes (click, scroll, input).
- Identify decision points (the user can go in two directions).
Tip: don’t prototype edge cases in your journey, just the main flow. If the user clicks on a link that’s not in the critical path, prepare a generic “This feature isn’t available in this prototype” screen, redirect them to the next step of the main journey, or simply don’t link it. That’ll save you time and unnecessary explanations.
By the end of this step, you should have a storyboard of 8 to 15 screens max covering a complete user journey.
Step 2: Collect real content (30 minutes)
A prototype with “Lorem ipsum” (generic placeholder text unrelated to the page) everywhere won’t trigger any useful reaction. Spend 30 minutes gathering realistic content:
- Text: titles, descriptions, button labels, error messages. If the final content doesn’t exist yet, write plausible text.
- Data: product names, prices, dates, quantities. Use real data or realistic data.
- Images: product photos, avatars, illustrations. Use Unsplash or images from the existing product.
Step 3: Build the screens in Figma (4 to 5 hours)
This is the production phase. Here’s how to optimize your time:
- Start with a main frame and define the target screen size (mobile 375px or desktop 1440px). Use Figma templates, they’re really good.
- Build a first complete screen with the basic components: header, navigation, content areas, buttons. This first screen will serve as a reference for the next ones.
- Duplicate and modify. For each subsequent screen, duplicate the previous one and only change what differs. This guarantees consistency and saves you a lot of time.
- Use an existing design system. Figma offers free component libraries (Material Design, iOS, etc.). Using off-the-shelf components will save you 2 to 3 hours.
- Stay in mid-fi. Grayscale, a single accent color for clickable elements. Don’t waste time on visual design.
Time-boxing: budget time per screen. If your storyboard has 10 screens, you have about 25 to 30 minutes per screen. If a screen takes longer, simplify it.
Step 4: Wire the screens with Figma’s prototyping (30 minutes to 1 hour)
In Figma, switch to “Prototype” mode and connect screens to each other:
- Select the clickable element (button, link, area).
- Draw a link to the destination screen.
- Pick a simple transition (dissolve or slide). Avoid complex animations: they take time and add nothing for a mid-fi test.
- Test the full journey in preview mode. Click each link and check that the flow is smooth.
Step 5: Test internally before the real test (30 minutes)
Before putting your prototype in front of real users, first test it yourself, then quickly with a colleague who didn’t take part in the design. Give them the brief you’ll give participants and observe:
- Do they make it to the end of the journey?
- Are there missing links or dead ends?
- Do they understand button and menu labels?
Fix the issues you spot. This 30-minute internal test can save you a whole user testing session.
The “Wizard of Oz” technique
“Wizard of Oz” prototyping is a technique where part of the interaction is simulated manually by a hidden human, without the user knowing. It can be useful for a calculation, a search result, or that kind of thing. It’s a bit dated in the AI era.
The principle
The user interacts with what they think is an automated system, but in reality, a human (the “wizard”) produces the responses in real time. The name comes from the film: the “great and terrible Oz” is just a man behind a curtain.
Concrete examples
- Chatbot: you’re testing a smart chatbot concept. Rather than developing the AI, a team member types responses in real time in a chat window. The user thinks they’re talking to a bot.
- Smart search: you want to test a search engine that suggests personalized results. The wizard watches the user’s query and manually picks the most relevant results to display.
- Product recommendations: you display a recommendation interface but the suggestions are hand-picked by a product expert watching the session.
When to use this technique?
- When the feature you want to test relies on a complex technology (AI, algorithm, third-party integration) that isn’t built yet.
- When you want to validate the value proposition before investing in technical development.
- When the cost of building a functional prototype is too high for what you want to verify.
Practical setup
- Identify the part to simulate. Which feature requires intelligence or processing that you can’t simply prototype?
- Build the “facade” interface. Build the user interface normally in Figma or HTML/CSS.
- Define typical scenarios. Prepare the most likely responses so the wizard can react quickly.
- Brief the wizard. They need to know the product, the expected responses, and especially respect a realistic response time (don’t reply too fast, or the user will smell the trick).
- Set up communication. The wizard needs to see what the user is doing (screen sharing, mirror) and be able to update the interface in real time (via a tool like Google Slides, a simple web back-office, or just by sending replies in chat).
Common mistakes to avoid
1. Too much detail too early. This is the most common mistake among junior designers. Spending 3 days polishing a high-fidelity prototype when the design direction isn’t even validated. If users don’t get the structure of your screen, the beauty of your design won’t change a thing. Always validate the structure before investing in the visual.
2. Not testing. A prototype that never lands in a user’s hands isn’t a prototype. It’s a mockup. The value of prototyping rests entirely on what it teaches you. If you don’t test, you’re just doing design. To learn how to run a test, see the article on user testing.
3. Prototyping the entire product. You don’t need to prototype every screen. Focus on the critical path: the main route the user will take to complete their task. Secondary pages (legal, settings, FAQ) don’t need to be prototyped for a test.
4. Using fake content. “Lorem ipsum dolor sit amet” doesn’t trigger any reaction in users. If your prototype contains fake text, users won’t be able to evaluate the clarity of your messages, the relevance of your labels, or the readability of your descriptions. Use real content, even if it’s approximate.
5. Getting attached to your prototype. A prototype is disposable by definition. If tests show the concept doesn’t work, throw it out and start over. That’s the point of prototyping: fail fast and learn fast, rather than failing after months of development.
6. Mistaking prototype for spec. A Figma prototype isn’t a spec document. It shows what the product does, not how it should be built. Pair your prototypes with technical annotations if you use them for developer handoff.
Prototyping and tools: the right tool for the right moment
| Tool | Fidelity level | Main strength | Best for |
|---|---|---|---|
| Paper + markers | Low-fi | Speed, accessibility | Workshops, ideation, early exploration |
| Balsamiq | Low-fi to mid-fi | Quick wireframes, “sketch” look | Fast functional mockups |
| Whimsical | Mid-fi | Wireframes + flowcharts | User journeys, sitemaps |
| Figma | Mid-fi to hi-fi | Full prototyping, components, collaboration | Producing testable prototypes and handoff |
| Axure RP | Mid-fi to hi-fi | Conditional logic, variables | Complex prototypes with dynamic forms |
| Framer | Hi-fi | Code-based prototyping, advanced animations | Near-functional prototypes, landing pages |
My take: Figma covers 90% of UX prototyping needs. Invest time in mastering Figma’s prototyping features (interactive components, variables, auto-layout) and you’ll only need another tool for very specific cases.
Going further
- The Design Sprint: the framework for going from a problem statement to a tested prototype in 4 days
- The sketching workshop: to explore concepts in low fidelity with a group
- User testing: to put your prototype in front of real users
- The experience map: to identify the critical journeys to prototype
- Knapp, J. (2016). Sprint: How to Solve Big Problems and Test New Ideas in Just Five Days. Simon & Schuster.
- Official Figma prototyping documentation
Want to go further?
I offer individual coaching to dig deeper and apply these topics to your context.
Book a session